Have you ever heard about dogstake flying? No?
Well, cutting a long story short it goes pretty much like this. You put a dogstake into the ground, running your flying lines through the triangular head, thus ‘bending’ the lines directly through this “head” on this traditional dogstake. Then you attach the kite to your lines, pick up the handles and walk down to your kite. Now you should have the wind blowing in your face and the kite sitting on the ground beside you. Now all you have to do is … fly that kite!
But now…. what’s left, what’s right. Is everything mirrored? What happens if you pull on your left line … or give on your right. Yeah, things get a little mixed up for sure! And you probably shouldn’t take up dogstake flying until you have som experience with ‘normal’ flying, having the basics down and a feel for the kite in the air.
In the early days, people were using those traditional dog stakes, hence the name dogstake flying, for this kind of flying. But due to the friction to the lines, there have been a lot of variations using everything from ceramic rings to ball bearing pulleys. Here are a few variations:
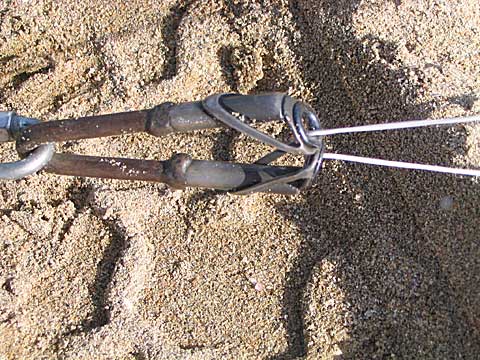
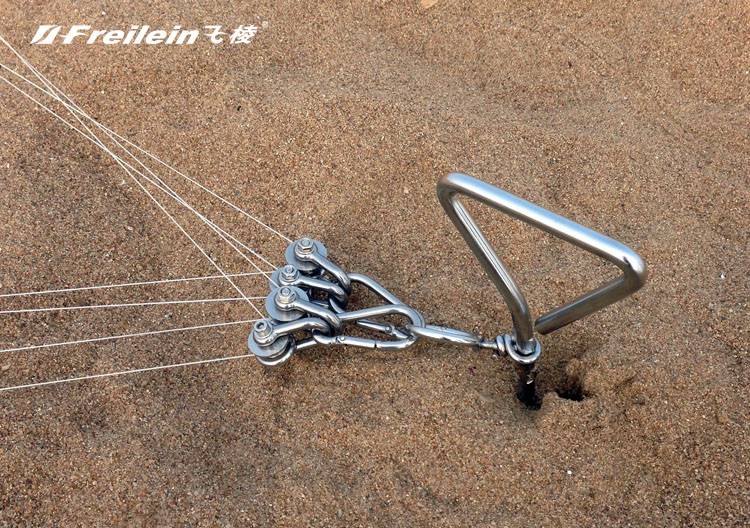

As you can see, things have developed and in the photo above you see Jeremy’s ball bearing pulley stuff tailor-made for getting the most out of your dogstake flying.
However, you don’t have to have the most sophisticated gear for having a taste of dogstake flying. No, all you need is a field with … let’s say a flag pole, or similar for bending your lines around.
No, it far from optimal and you definitely can feel a lot of friction on those lines bending around the pole. But hey, it is possible and a lot of fun.
Make sure to give it a go on a windy day. Higher wind will compensate somewhat for that friction. Launch your kite beside the pole and walk it downwind until the middle of your lines aligns with the pole. Then start walking in a big circle to the opposite side of the pole as where your kite is. (If your kite is to the left of the pole you walk the circle to the right.)
Make sure that your lines touches the pole and soon the lines are bending at 90 degrees pivoting at the pole.
If you’re feeling comfortable with this, keep on walking that circle and soon you will be standing next to your kithe with the wind blowing directly into your face. And now is when the fun starts!
Go slow and try to fly your kite from that weird point of yours. Prepare yourself for failure, but keep on flying and it will slowly but surely come to you!
One thing though! Wear (sun)glasses for protecting your eyes! You’re gonna get hit by that kite – yes, you will – and some eye protection is important!
…and this way of bending the lines adds wear, so it might be a good idea not using your fave new lineset!
…ok, here’s a video to get you going!